Gates in the Location Editor
A gate is a location. It is a point where traffic crosses into or out of the yard, so it sits on the map like any other location, under a facility or directly under the site.
Two screens work together, and each owns a different question:
| Screen | Answers | Who |
|---|---|---|
| Location Editor | Where is the gate? | Admin |
| Gate Editor (Admin Configuration) | How does it behave: direction, active or not, and the data collected when assets cross? | Admin |
You create the gate in the Location Editor, then tune it in the Gate Editor. See Gate Configuration for the Gate Editor.
Gate Management is an optional add-on. See the Gate Management overview.
Create a Gate on the Map
- Choose Gate in the tool strip.
- Click the map where the gate is. Placing a gate works exactly like placing a location.
- A New gate row opens in the tree with the name field selected. As with any pin, it shows Lands in ... and, when the parent is ambiguous, a choice of parents.
- Type the name, using what the gatehouse calls it ("North Gate"), and press Enter or click ✓ Accept. Escape or ✕ Cancel discards it.
The location is saved, and a gate is created for it with:
- Name: the location's name.
- Direction:
bidirectional. - Active: yes.
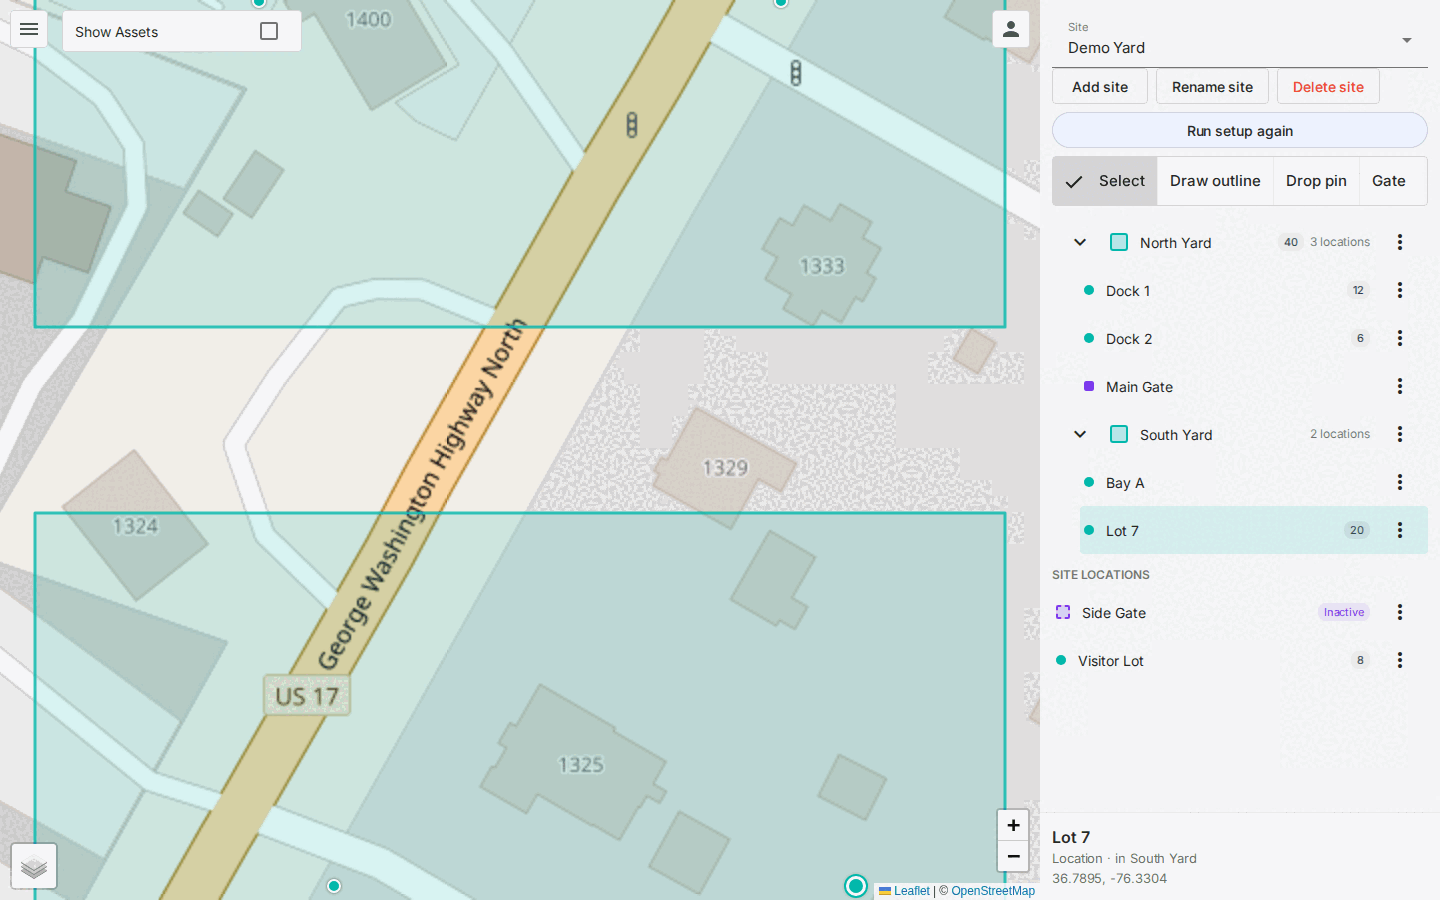
A gate outside every outline lands under the site and appears under Site locations. On the map a gate is a violet square.
To move a gate, select its square and drag it, or use Move pin from its ⋯ menu. See Locations & Pins.
Turn an Existing Location into a Gate
Open the location's ⋯ menu and choose Make a gate. The location itself does not change; only the gate is added. The gate row in the tree gets the gate marker.
To stop using it as a gate, choose Stop being a gate. This deactivates the gate; it does not delete it. Past crossings still refer to the gate, so history stays readable. Choose Make a gate again later and the same gate is reactivated.
If you choose it again before the first change has finished, the editor says the location is still being made a gate and asks you to try again in a moment.
Direction, Activation and Data Collection
The Location Editor decides only where the gate is. Open Gate Editor in Admin Configuration to change anything else:

- Direction:
inbound,outboundorbidirectional. - Activate or Deactivate a gate, from its ⋯ menu or the Active Status field in its Edit form.
- Capture forms and the other data collected when an asset crosses.
A deactivated gate is not removed. It stays on the Location Editor map as a hollow violet square with a dashed outline, and its row shows an Inactive badge. Make a gate on that location reactivates the same gate.
The Gate Editor's Add Gate button takes you to the Location Editor, because new gates start on the map.
The gate list shows the Location of each gate and its Parent (the facility it is in, or the site). A gate whose location cannot be found is flagged Location not found. Open the gate with Edit and pick its location again. In that form the location field is labeled Site, with the hint "Site location is required". A facility or location that has no id yet is greyed out with Save this location in the Location Editor first; save it there and it becomes selectable.
Appointments at a Gate
A gate directly under the site has no facility of its own. When an appointment is checked in at such a gate, Yard Spot accepts it if the appointment's facility belongs to the same site. A gate inside a facility checks against that facility.
Where the Gate Is Stored
Under the hood, a gate's siteId holds the id of its location. The field kept its old name
for compatibility. Because relationships use ids, renaming a location never breaks its gate.